How do I schedule different Leads to send emails on different date ?
When you want to schedule emails to go on pre-determined date for individual leads so that all leads won't be scheduled on single day.
Knowledge Base for 7Targets AI Sales Assistant aka Virtual Sales Assistant
Learn to efficiently identify dropped leads using the 7Targets Chrome Extension within Gmail. Discover how to spot potential customers who’ve lost interest and reactivate them. This tutorial guides you through authorizing the extension, identifying dropped leads, and reviving them for increased sales. Unlock the power of the 7Targets dropped leads Extension to boost your lead management and business growth.
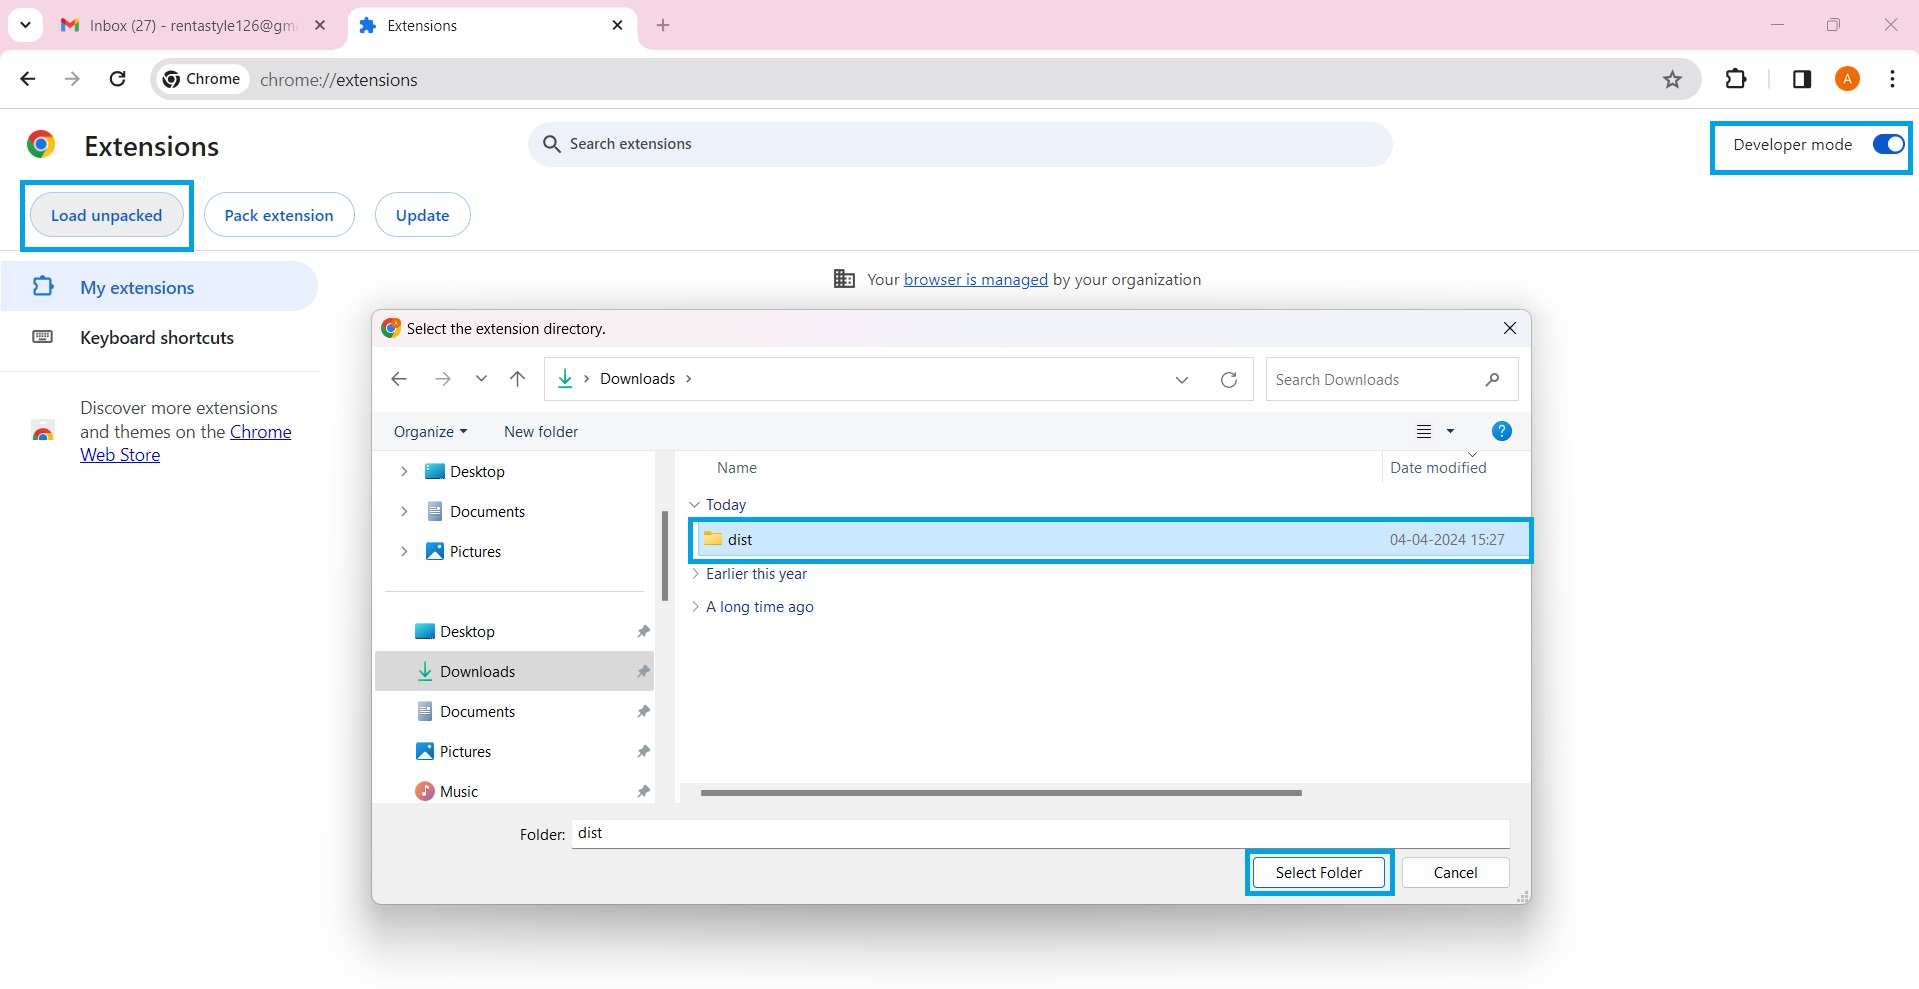
To get started with the 7Targets Chrome Extension, follow these simple steps:
Visit the Chrome Web Store and search for “7Targets Dropped Leads Extension” or download it from this link.
Once you’ve found the extension, click on the “Add to Chrome” button to start the installation process.

The extension will be downloaded and installed automatically. Once completed, you’ll see a confirmation message.
Look for the 7Targets icon in your Chrome browser toolbar to confirm that the extension has been successfully installed.
Now that you’ve installed the 7Targets Chrome Extension, you’re ready to proceed with Gmail authorization and identifying dropped leads.
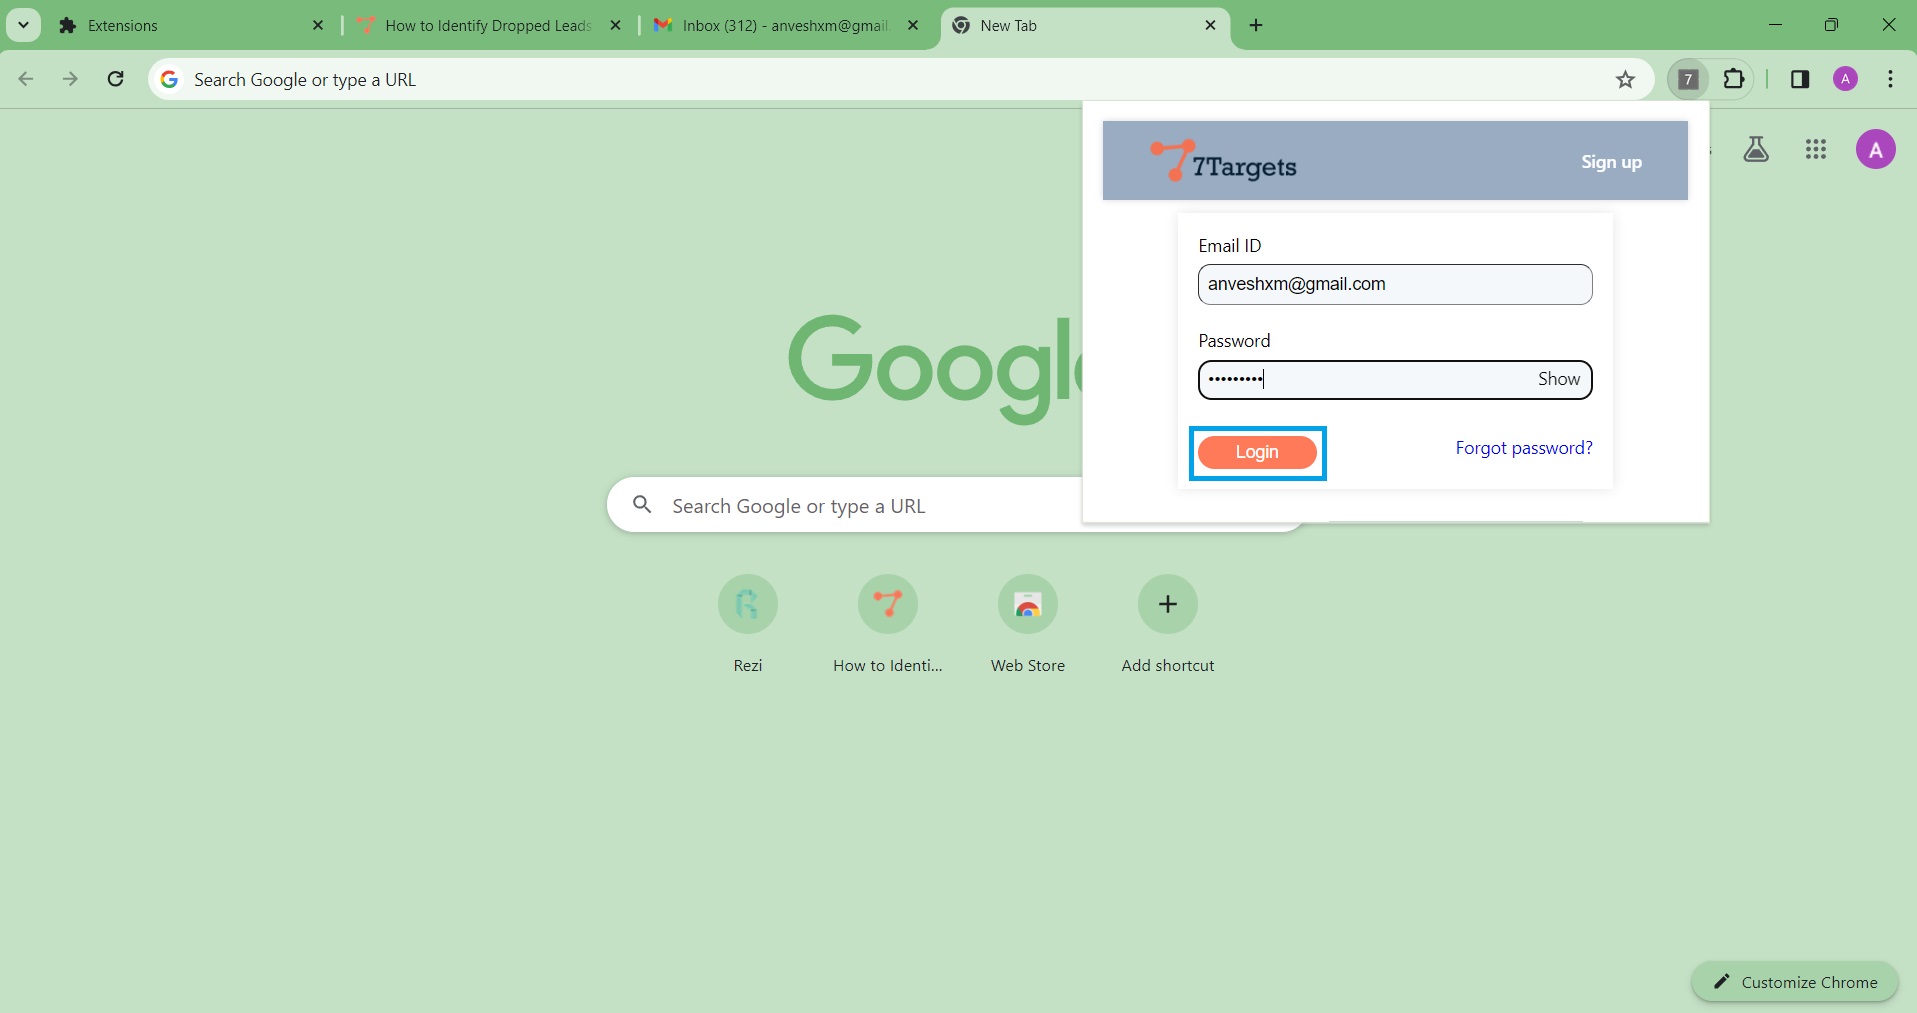
To start using the 7Targets Chrome Extension, you’ll need to log in with your 7Targets account. Here’s how you can get started:
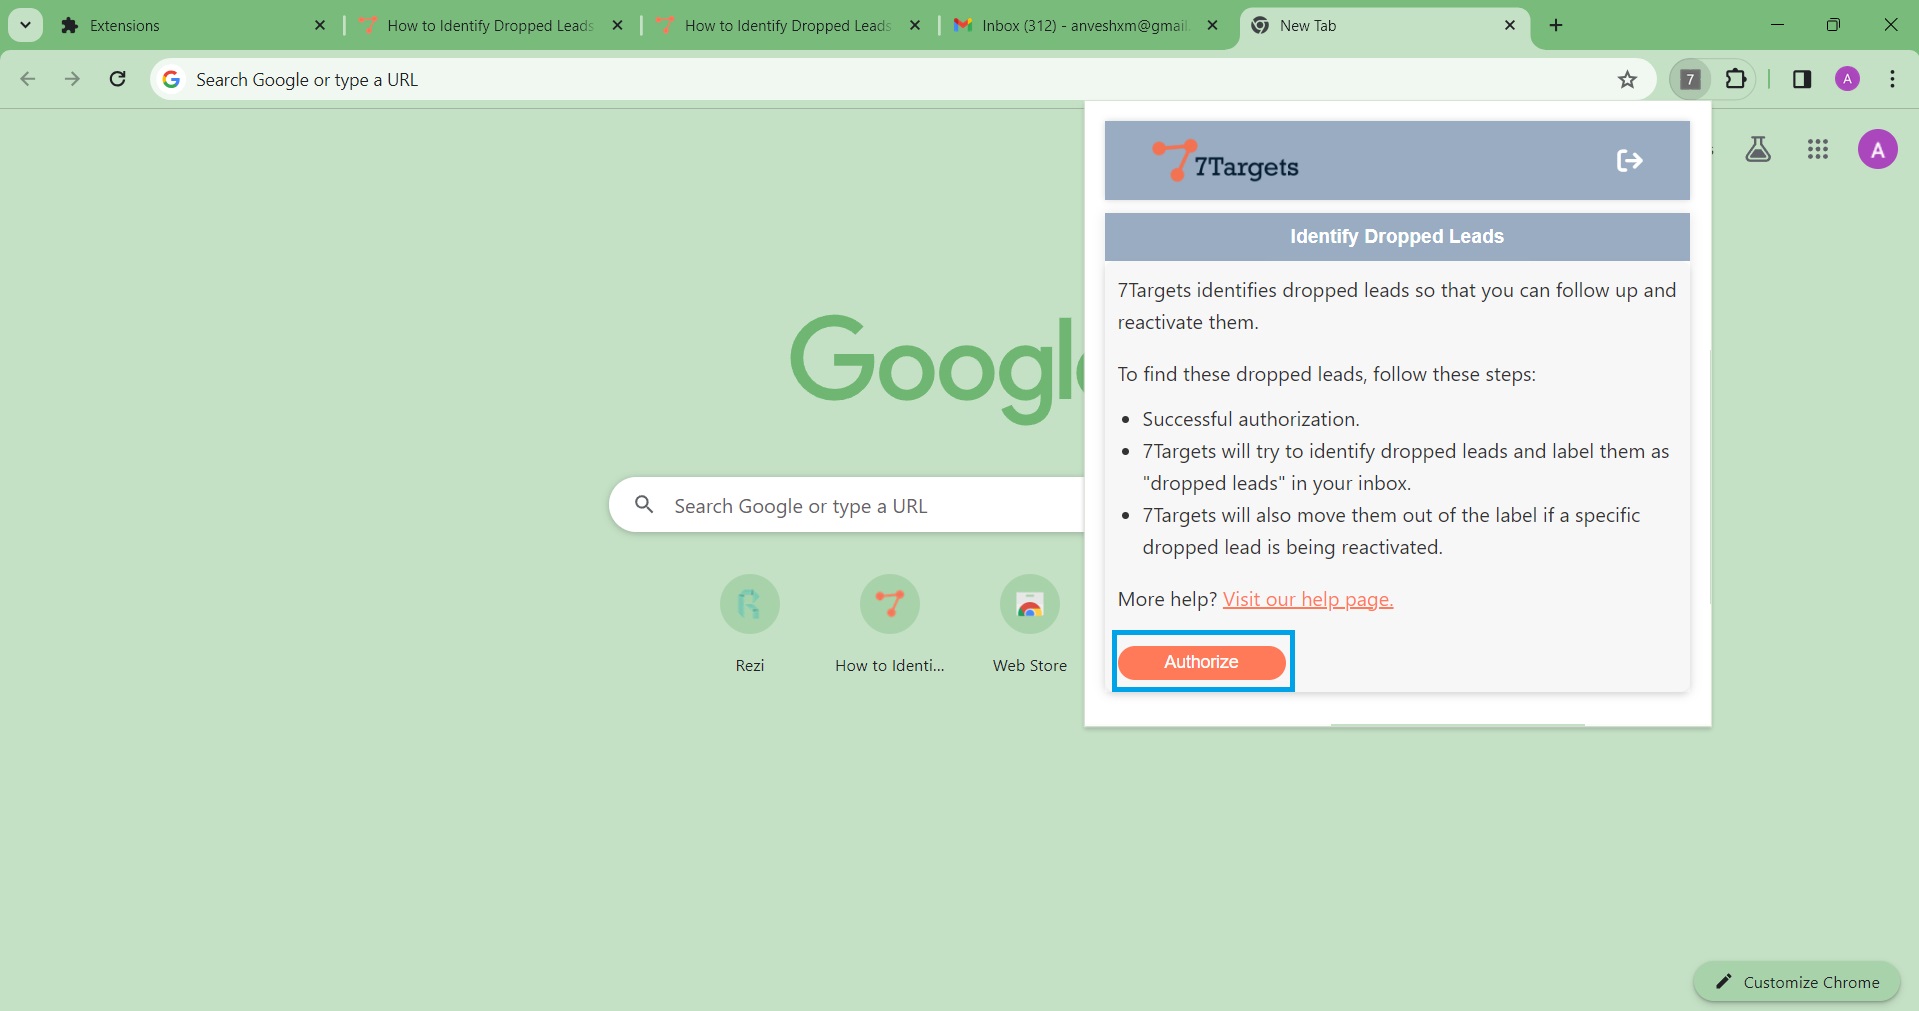
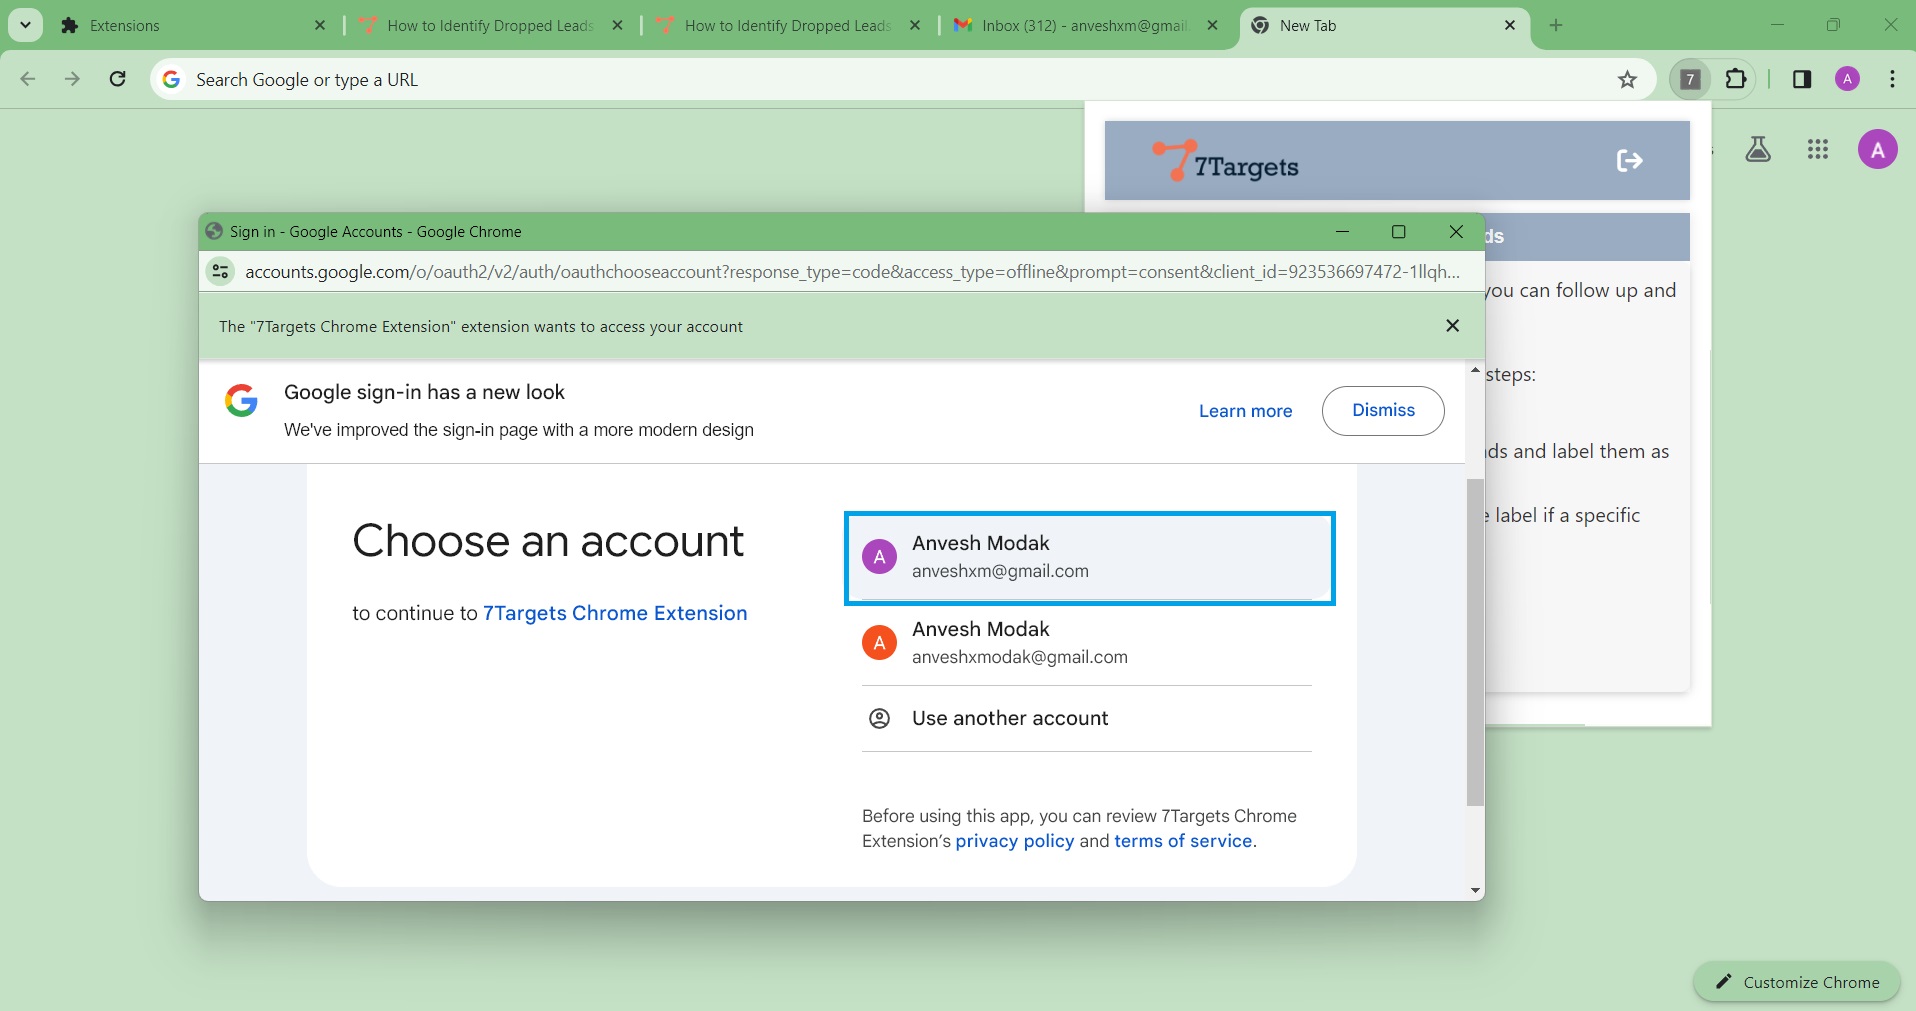
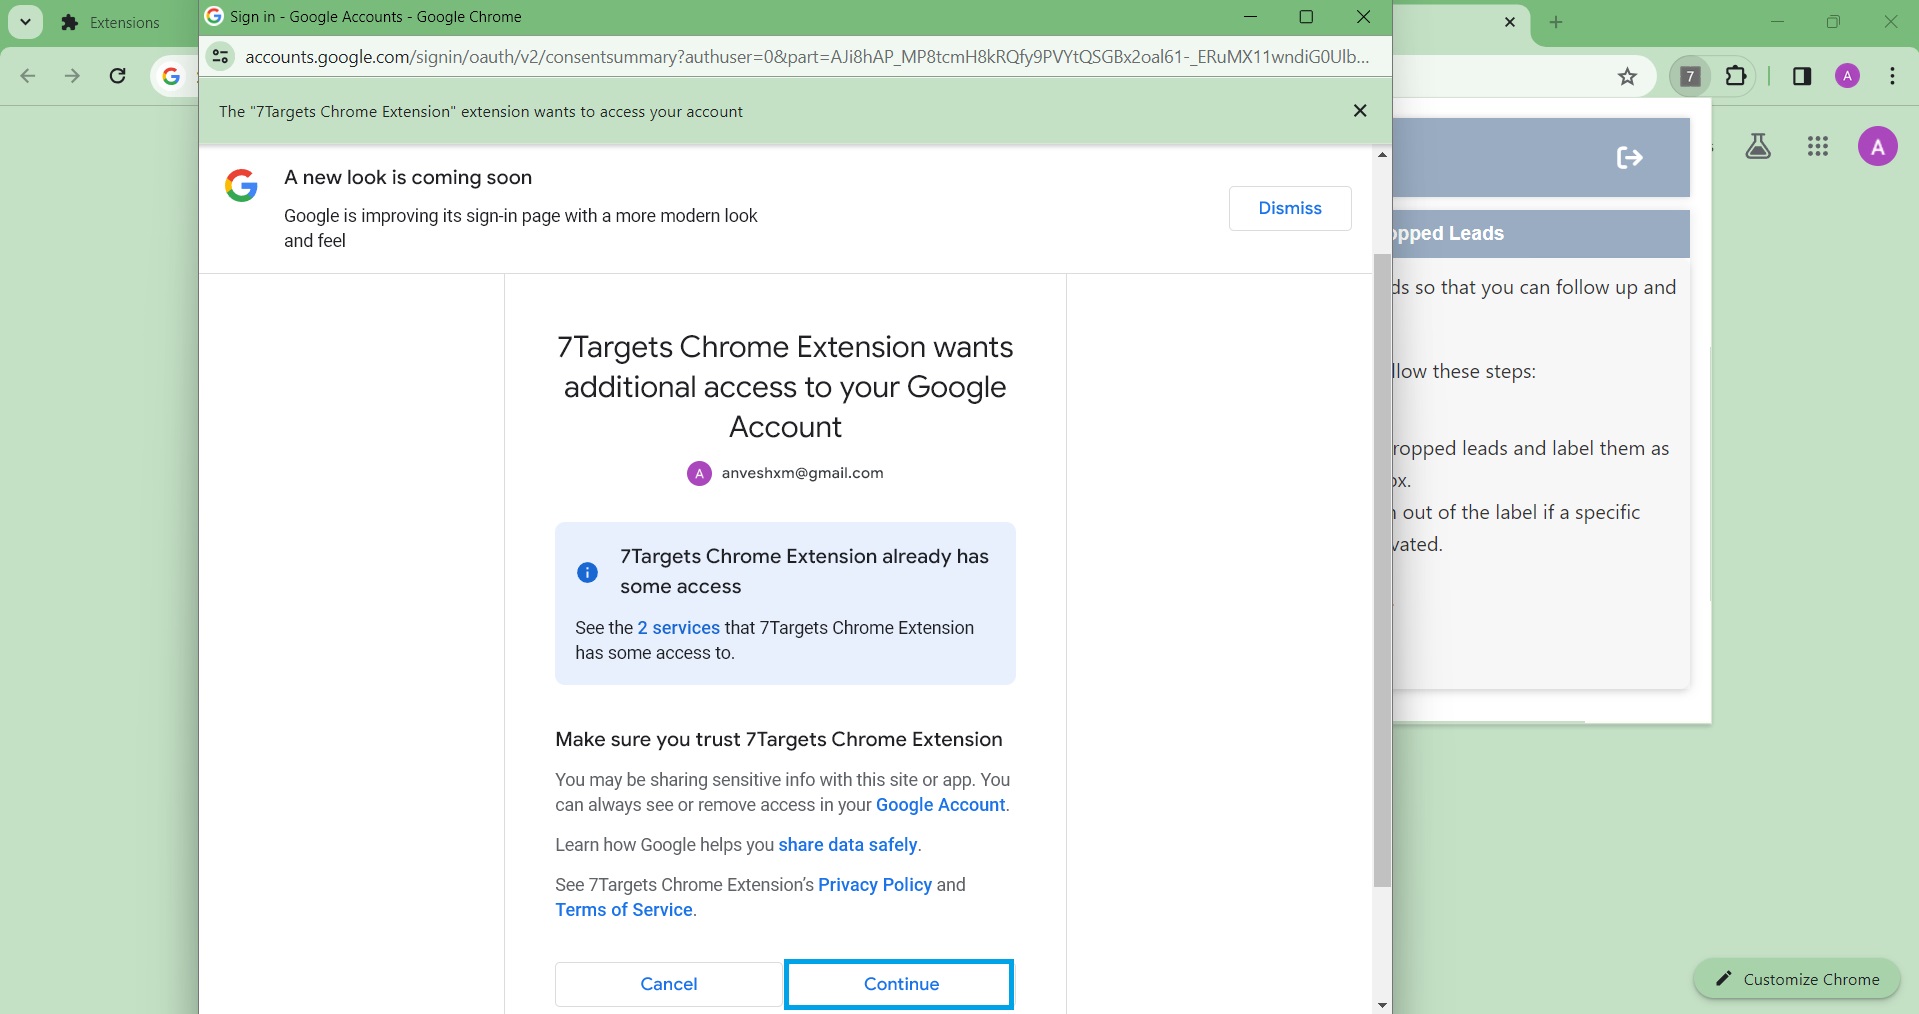
With the 7Targets Chrome Extension authorized, it can now effectively identify dropped leads in your Gmail, and you can take proactive steps to reactivate them, boosting your sales and business growth.
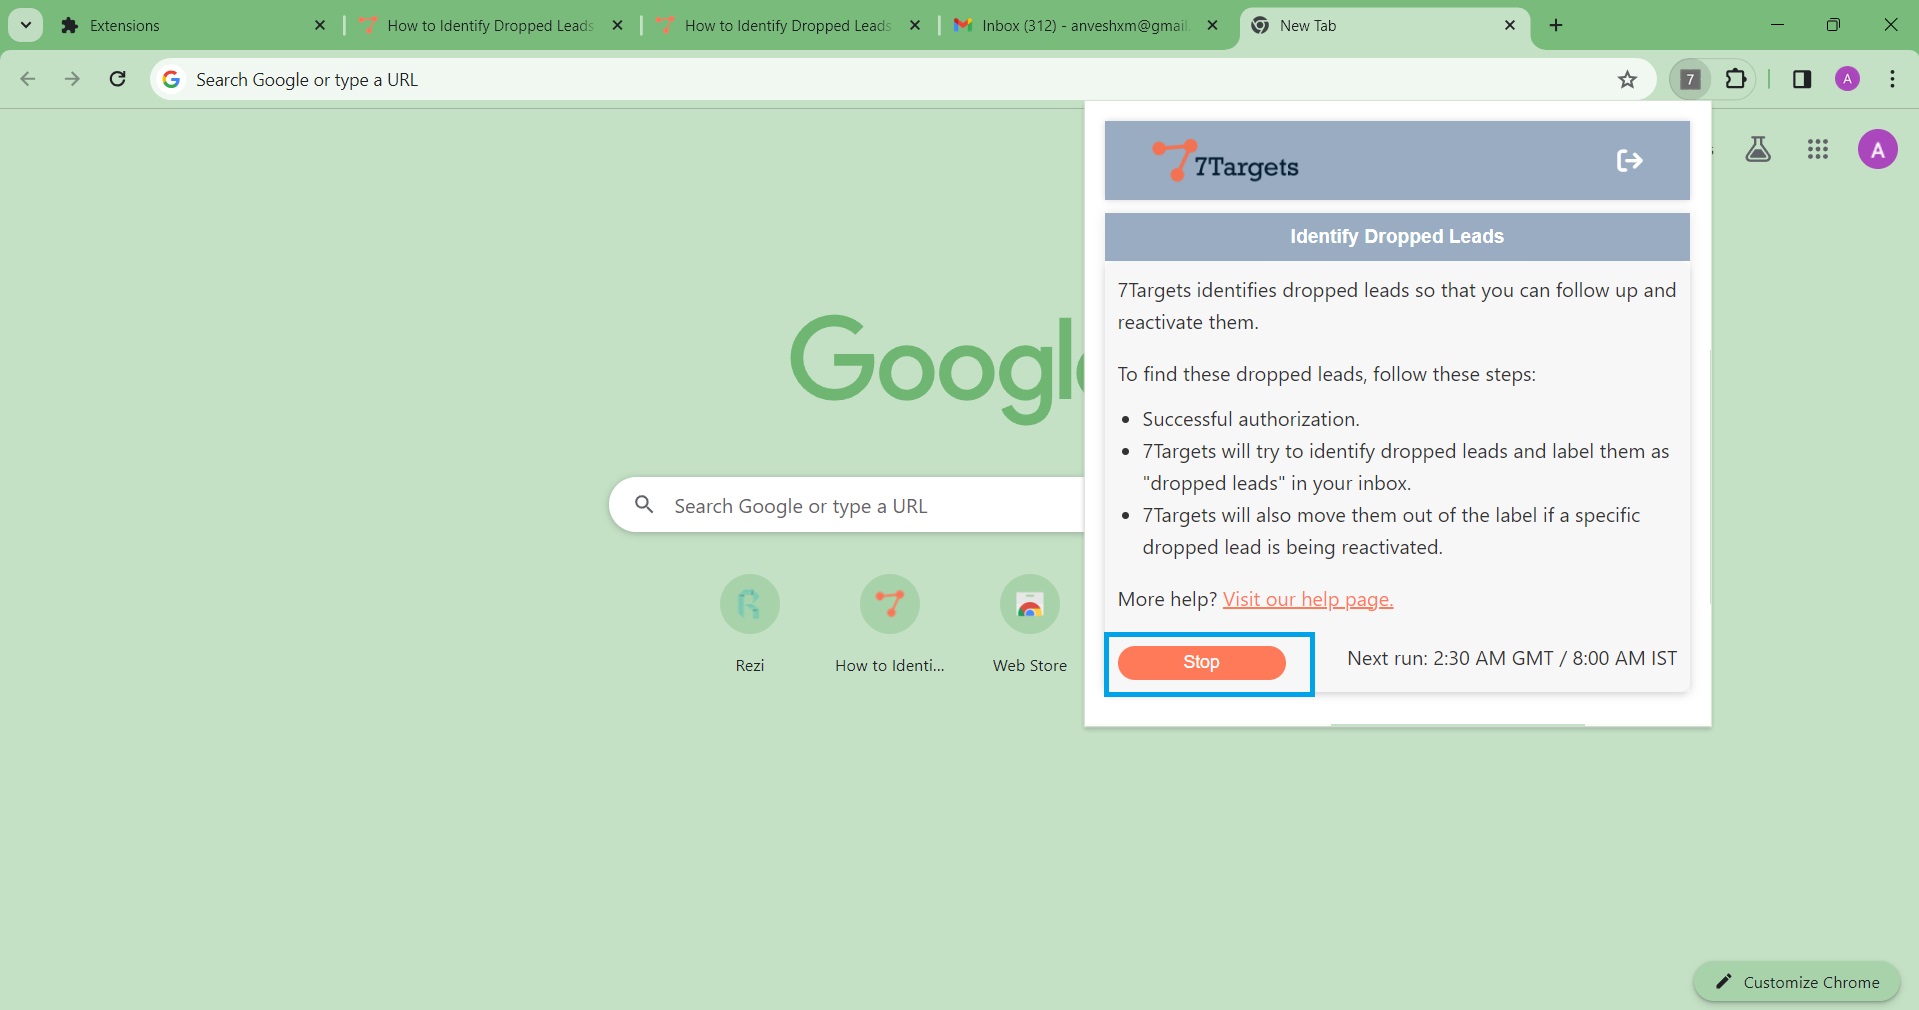
Once you’ve authorized the 7Targets Dropped Lead Extension and ensured it has access to your logged-in Gmail account, you can identify dropped leads. Here’s how:
When the extension runs for the first time, it will analyze emails from the last 5 years in your Sent folder to identify any dropped leads.
Then, The extension will automatically analyze your sent emails every day at 10:30 AM GMT (4:00 PM IST) to identify dropped leads.
Dropped leads will be labeled as “Dropped Leads” for easy identification.
All identified dropped leads will be moved into the designated label in your Gmail account.
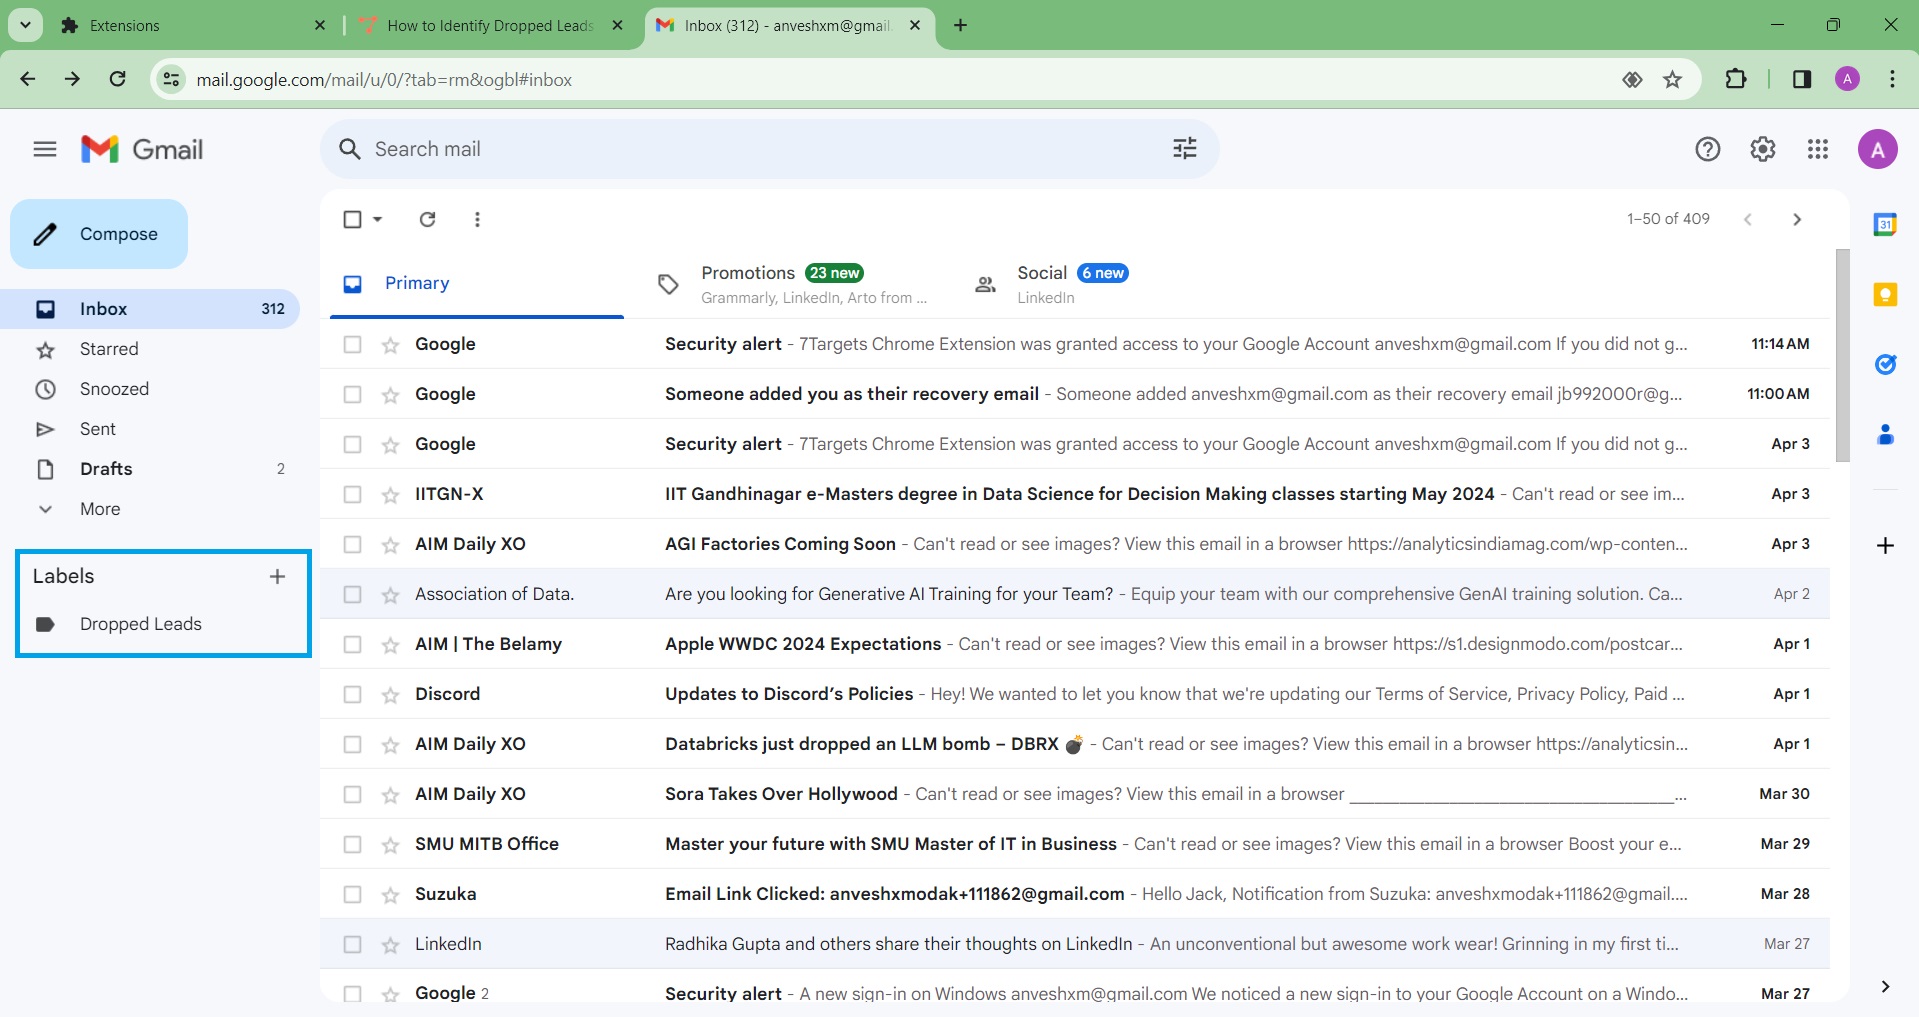
Review the labeled emails to identify dropped leads, then take proactive steps to reactivate them.
Each day, the extension checks if you have followed up with any dropped leads within the last 5 days. If you have, the lead will be removed from the “Dropped Leads” label.
By efficiently identifying and reactivating dropped leads, you can boost your sales efforts and business growth.
The extension will automatically analyze your sent emails every day at 10:30 AM GMT (4:00 PM IST) to identify dropped leads.