How do I schedule different Leads to send emails on different date ?
When you want to schedule emails to go on pre-determined date for individual leads so that all leads won't be scheduled on single day.
Knowledge Base for 7Targets AI Sales Assistant aka Virtual Sales Assistant
Most companies buy data from third parties. Or have a junior team work on collecting contacts. Those contacts are then uploaded into the system in a required format, and then someone else, who understands the business, uses those contacts to start a campaign.
7Targets supports this 2 step process,
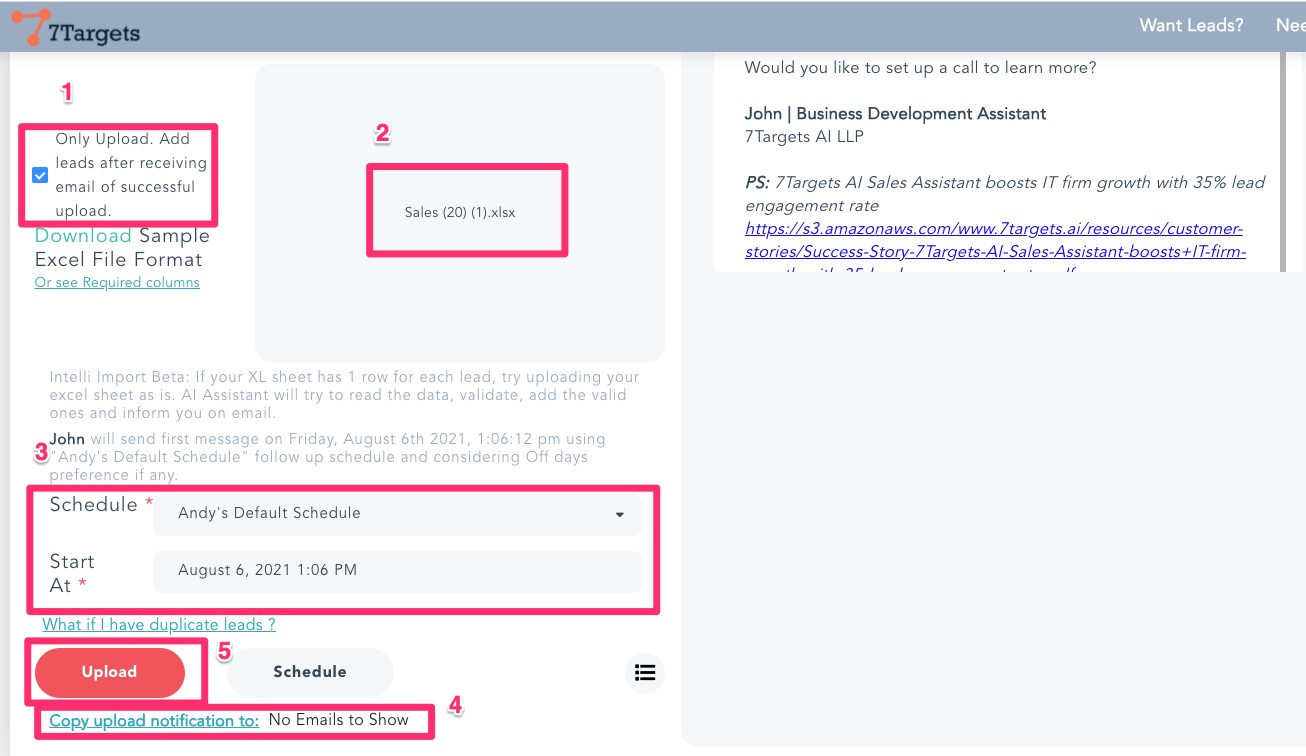
Once the ‘uploader’ uploads a file, the file is verified by the AI Assistants offline. If file is invalid, then the uploader get an email from the AI Assistant. If the file format is valid, an email is sent to the uploader as well as the approver that the file is successfully uploaded. File format is verified.
Validity of emails is NOT done in this step. Just format of the file is validated. Once the approver get a notification, then he/she can verify if those are the right leads that need to be added to the system. To proceed, the approver can go ahead with ‘Add Lead’ action, and get started with the lead nurturing campaign. Detailed step by step instructions are given below.
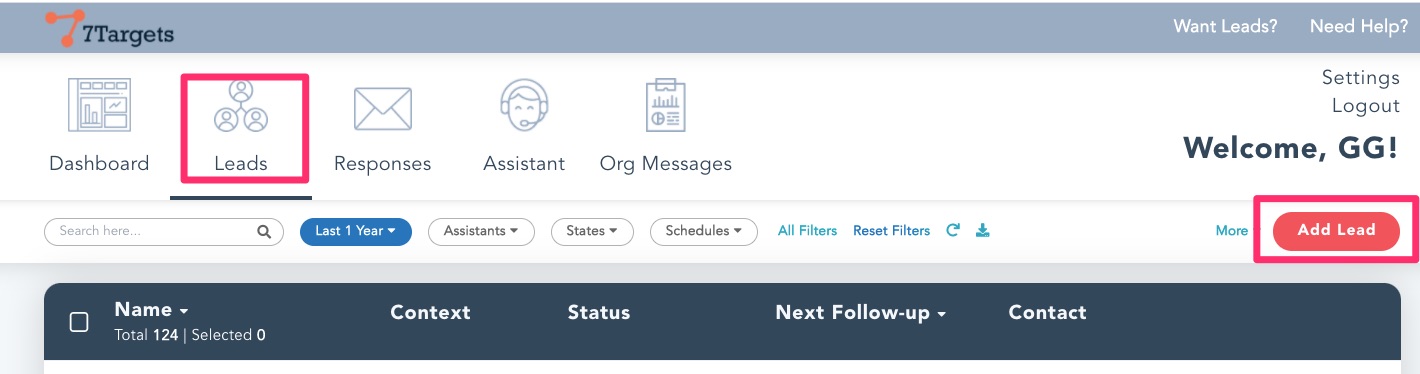
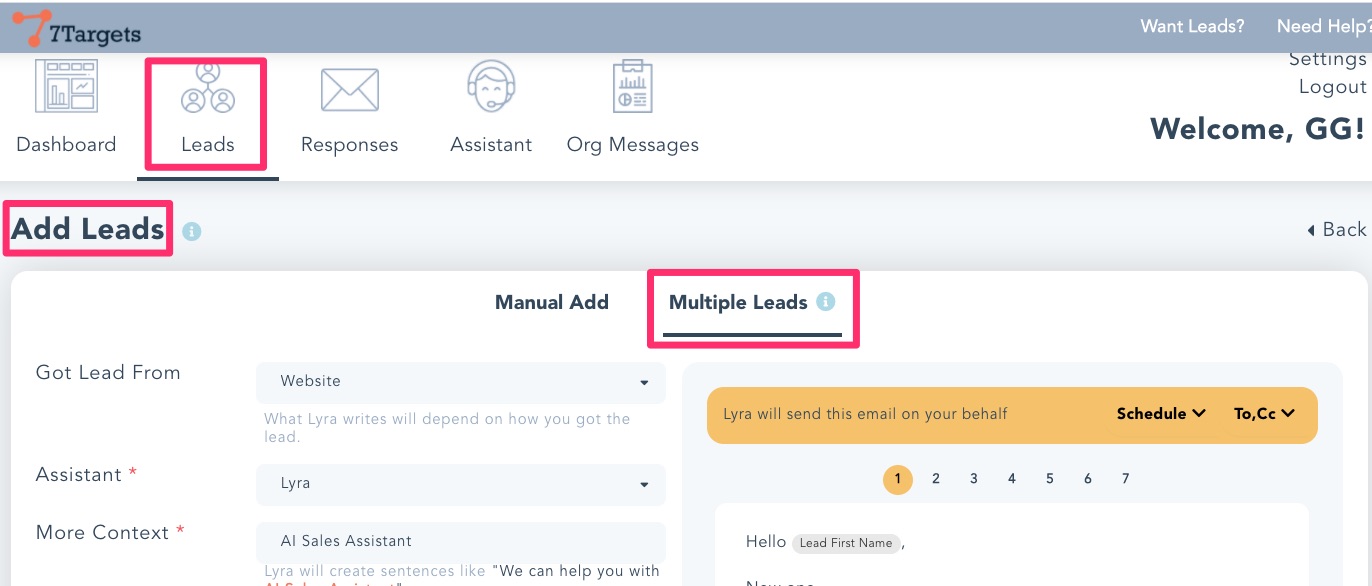
Go to ‘Leads’ and click on Add Leads
Go to Multiple leads and provide values for ‘Got leads from’, ‘Assistant’, ‘More Context’, etc.
On successful excel upload, an email is sent by the AI Sales Assistant. Forward this email to any other approver if required. Approver can verified the leads, the selected Assistant, the Sequence, and the date-time - change them as needed, and then proceed with adding the leads.
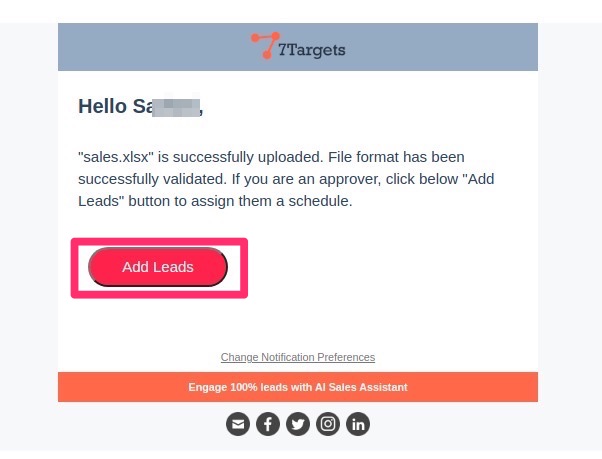
Click on “Add Leads” button in the email.
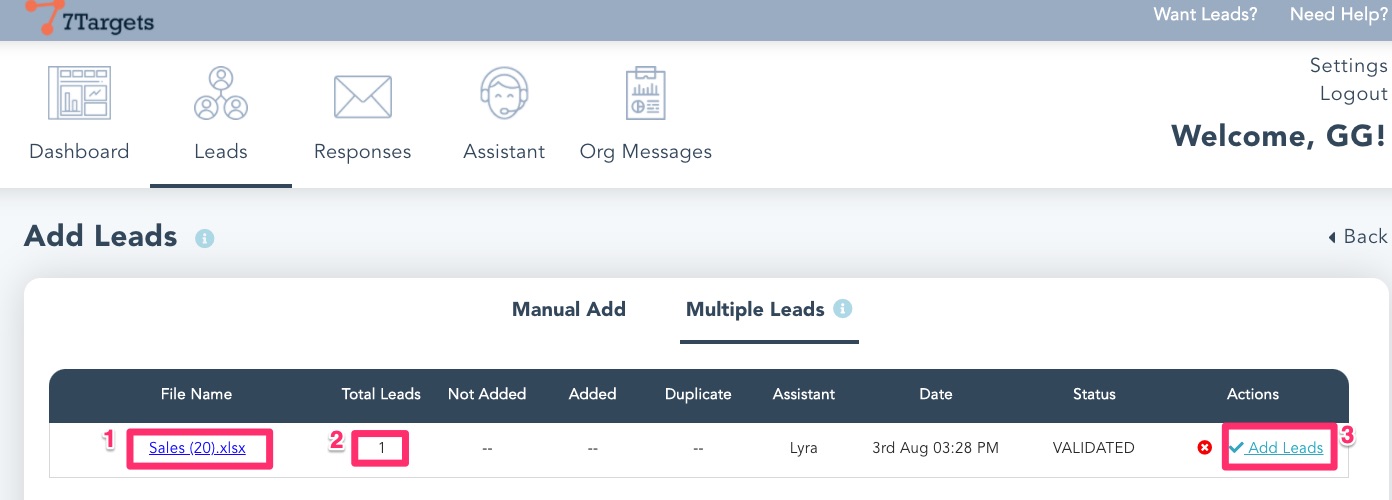
Verify action brings up the below screen. Verify other details like sequence, etc. change if required. Then click on Add Leads.

Click on ‘Add Leads’ opens the final confirmation window. Provide the details and confirm the action

You are done with this. The leads will be added and Assistant will work on it.
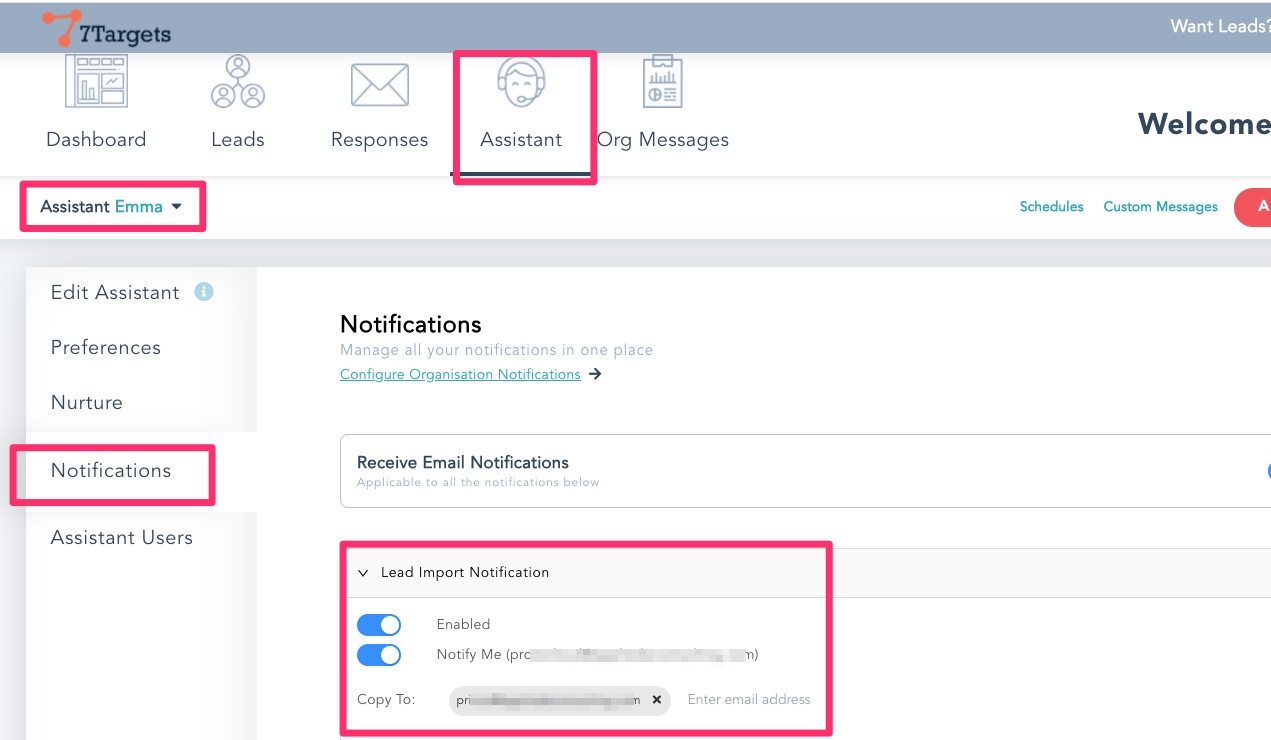
In the Assistant tab. For the selected Assistant and Lead Import Notification. You can add a Copy To email id. When the file is uploaded then Assistant will notify you and the person in the Copy To.
The Copy To person can be the approver who can then click on the Add Leads button in the email notification to verify and actually add leads.
If you have any further doubts you can directly mail us at info@7targets.com.