How do I schedule different Leads to send emails on different date ?
When you want to schedule emails to go on pre-determined date for individual leads so that all leads won't be scheduled on single day.
Knowledge Base for 7Targets AI Sales Assistant aka Virtual Sales Assistant
Leads from Salesforce CRM can be assigned to 7Targets AI Sales Assistant directly within the Salesforce UI.
Simplified Configuration steps for 7Targets AI Sales Assistant Integration with Salesforce
Leads from Salesforce CRM can be assigned to 7Targets AI Sales Assistant directly within the Salesforce UI. AI Assistant will then own the lead and nurture to try and get the meeting. Assistant will also update Salesforce putting notes for the emails being sent as well as status of the lead in salesforce.
Important Note: Before you go ahead with Salesforce configuration, make sure you have Sufficient Privileges for e.g. creating new Apex Triggers, Apex Classes, Custom metadata etc.
Below three custom fields are to be added to the Lead Object.
| Field Label | Field Name | Data Type |
|---|---|---|
| 7Targets Assistant Email | sts_assistant_email | Picklist |
| 7Targets Lead State | sts_lead_state | Picklist |
| 7Targets Sequence Name | sts_sequence_name | Picklist |
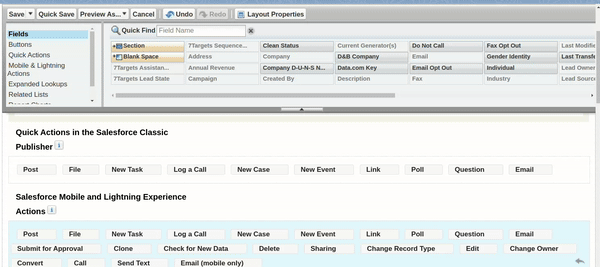
a. Goto Setup > Object Manager > search Lead in Quick Find Box.
b. In Lead Object go to Fields & Relationships > Click on New button to create three new fields as in screen shots below.
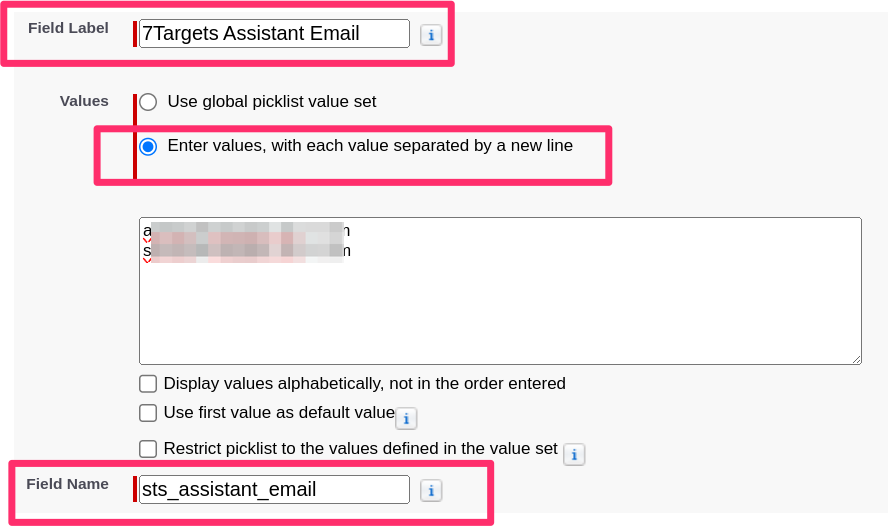
7Targets Assistant Email
You will copy your assistants email ids from 7Targets and update the values in following field.
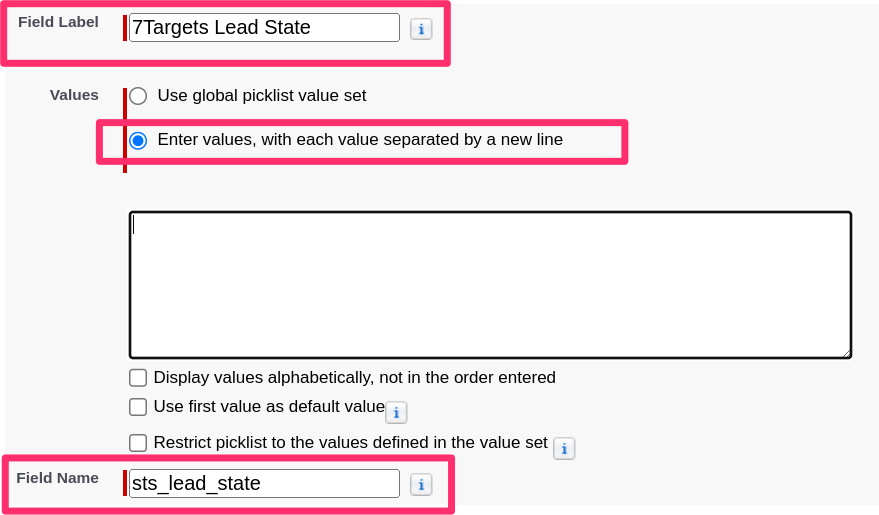
 7Targets Lead State
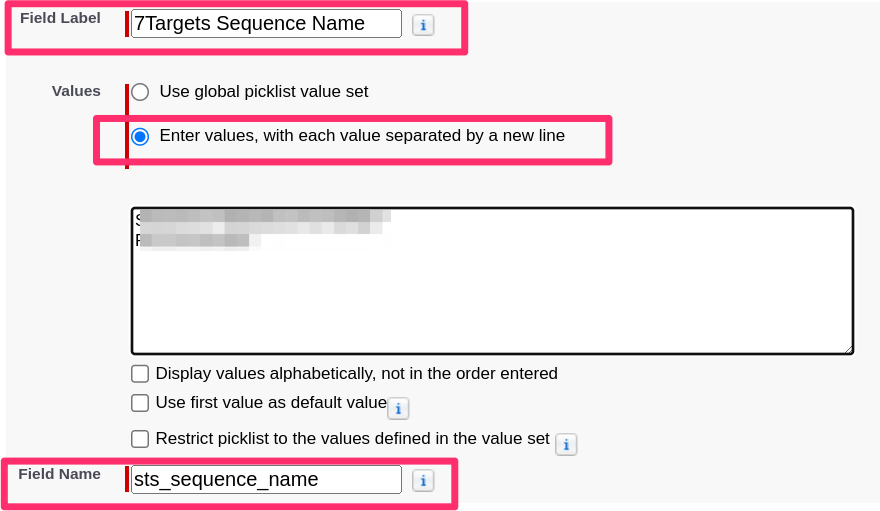
 7Targets Sequence Name
You will copy the sequence names from 7Targets and update the values in this field later.
7Targets Sequence Name
You will copy the sequence names from 7Targets and update the values in this field later.
Get 7Targets API Client Id & Client Secret from support@7targets.com.
a. Goto Setup > search custom metadata types in Quick Find Box.
b. In Custom Metadata create a new metadata named 7Targets API Credential as shown below.
 c. Add below fields in this Custom metadata and use the values given by 7Targets support for Client Id and Client Secret.
d. For 7Targets User ID field. Get the value from 7Targets->Settings->User Identifier. Make Sure this user is assigned to all the Assistants that are being used in Salesforce Integration.
c. Add below fields in this Custom metadata and use the values given by 7Targets support for Client Id and Client Secret.
d. For 7Targets User ID field. Get the value from 7Targets->Settings->User Identifier. Make Sure this user is assigned to all the Assistants that are being used in Salesforce Integration.
| Field Label | Field Name | Data Type |
|---|---|---|
| 7Targets Client Id | Seven_Targets_Client_Id | Text Area(255) |
| 7Targets Client Secret | Seven_Targets_Client_Secret | Text Area(255) |
| 7Targets User ID | Seven_Targets_User_ID | Text(100) |
In Setup search for Apex Classes & create a new Apex Class called SevenTargetsLeadIntegration. You can find the code here. Copy and paste this code for this Apex class.
In Lead Object go to Triggers > Click on New button to create new Trigger called LeadTriggerFor7Targets. Copy the code from here to create a new trigger and then save the trigger.
With this you are all set. You can assign an existing Lead in Salesforce by updating the 7Targets Assistant Email value. That lead will then be created in 7Targets.
You could check the Lead Notes in Salesforce for confirmation. There is a direct link to see this lead in 7Targets too, which you can click and see that lead in 7Targets along with the timeline of messages schedule.
If you want to stop sending messages, just change the value of field 7Targets Assistant Email in Salesforce to None.
Private key create while creating the connected app, mostly is in the form of a file named server.key
Copy the content of that file and use https://www.base64encode.org/ to encoded that file content to Base64. Use that when creating/configuring 7Targets.
For any help feel free to drop us an email at support@7targets.com